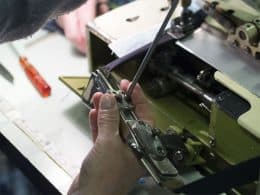
When you are learning how to sew, it’s impossible not to encounter any problems. Let’s be honest, a sewing machine doesn’t have issues when it is sitting in the closet, but it does when you have the most important sewing project. How many times did you ask yourself how to fix a sewing machine and decided it is way out of your league?
But as complicated as they might seem, the most sewing machine problems have really simple solutions. So, it doesn’t require you to make a trip to the repair shop.
Now, even the very skilled seamstress can feel overwhelmed when there’s a dreaded skipped stitch or a broken needle. There is nothing more annoying when the thread is bunching or when you detect that whir sound of the machine.
This is why this kind of guideline that I will show you will be such a relief in those strained moments. Today you will learn how to solve most of the problems these sewing machines have, and also how to deal with the solutions. First of all, I suggest you get familiar with the mechanism of your sewing machine, as each model is different, then follow these easy guidelines.
Table of Contents
The First Thing to Do when the Sewing Machine Breaks
When you learn how to sew, a mistake or two is inevitable. It is part of the process of learning, so don’t get frustrated. Even a very skilled sewer can become the victim of a simple sewing machine.
Maybe you don’t want to hear this, but the very first thing you need to do is to take a deep breath. Look at the issue with calm, even if it is annoying, as the troubleshooting process will become easier. Take a moment to reflect, breathe and don’t let the frustration get bigger. Look at the issue objectively and cut the internal “ugh” of despair.
So, let’s get over the spiritual part and make things more practical. Let’s count the most common issues of the sewing machines and their solutions. Learn how to solve the problems and save some money doing so.
10 Solutions on How to Fix a Sewing Machine
I won’t talk about the sewing machine’s most complicated problems, as those ones might need to be solved in a specialized service. Down below you will find the most common issues, that with a little ability and some good information can be repaired all by yourself.
Problem 1: Thread is Bunching Under The Fabric
Sometimes it happens to have a really straight stitch on the top, but a “crowd” of material on the bottom. So why does this annoying inconsistency happens? The first thing that will go through your mind is that the bobbin is the issue. And you are not very far from the truth. Then, the thread is going under the fabric, because there is no tension on the upper thread. Makes sense?
The solution: The first thing you need to do is to lift the presser foot lifter and rethread the sewing machine. By doing so, the tension of the mechanism will unlock and get the thread. Then you will need to raise the take-up lever, so the needle will go to the highest position. This way, you should obtain the right tension.
Check the video and see how it is done:
Problem 2: Your Stitches are Uneven
When a needle is twisted or damaged, most of the problems of sewing tend to appear. Therefore, experts in sewing recommend you to replace the needle for every 16 hours of stitching time.
Another trigger of this problem, although it might seem to you very off, is how you use to handle the fabric while sewing. If you are pulling the fabric from behind, in order to make it go through the machine, then the result will be very unclean stitching. Moreso, in time, this can cause the breaking of your machine. I would name this a force-feeding of the fabric against the metal teeth-like ridges, which are called the feed dogs. The coaxing will move away from the needle and the stitches will be sewn.
The solution: try to work with the machine gently and never force it.
Problem 3: Tangling Produced by Abnormal Threading
There might appear a “ball” of tangled thread, which is so annoying, I know. This is usually a result of improper threading of the sewing machine. The fault doesn’t stay only in the bobbin, but the fault lies also in the presser foot. One of the most common mistakes is people who thread the sewing machine with the presser foot down.
The Solution: To fix this issue, place the presser foot up and try to completely unthread your sewing machine. Most of the time, you will need to retread the sewing machine while keeping the presser foot up, but I would recommend you to follow your sewing machine’s manual. This way, you will know that you do the correct job.
Problem 4: The Needle Keeps Breaking
First of all, needles are sized from 8 to 20, depending on the way you are going to use them. While the sizes 9 or 11 are best for thin, delicate materials, sizes 16, 18 and 20 are reserved for thicker materials, like denim. So, if you will use a needle of size 9 for sewing denim, is crystal clear that the needle will break. So, the question you need to ask yourself should be: “Am I using the needles in the right way?”
The solution: Before sewing, I would recommend you to check a full-size chart, this way you will know which needle suits each material.
Problem 5: Skipped Stitches
This one has to do with the previous problem, as it is the cause of the use of the wrong type of needle. You need to adapt it to the fabric you are sewing. Skipped stitches can also be the result of a bent needle. It happens when you are forcing the fabric, rather than letting the machine feed it automatically.
The solution: The easiest rule you need to remember is that a knit fabric requires a ballpoint needle, while a woven textile needs a sharp needle. Also, if the machine is sewing fine, but you observe a permanent need of changing the needles, you need to make sure that machine is feeding the fabric by itself and that you are not forcing the fabric through the sewing process.
Problem 6: The Fabric is not Feeding Under The Needle
Most of the sewing machines come with a setting that lowers the feed dogs, which makes possible the free-motion sewing. Now, normally, the feed dogs are moving the fabric under the sewing machine needle, but when the feed dogs are not coming up and move the fabric, it’s time to check if there is a special setting that has lowered the feed dogs.
The solution: if you don’t see such a setting on the machine, maybe it’s a problem of cleanliness. Yes, you heard it right. It’s time to take off the throat plate and clean all the dust, lint, and the thread.
You should also oil the machine.
Watch the following tutorial to learn to do it properly.
If it still doesn’t work, take the sewing machine manual and search for the problem.
Problem 7: The Jammed Sewing Machine
As odd and dramatic it may sound, jamming is a very common problem for sewing machines.
The solution: the first step you need to do is to remove any fabric that you were sewing. You need to be gentle and tug at the fabric and lift it up enough. This way, you will be able to snip at the threads and pull the fabric free from the machine. Then, remove the jammed thread from the bobbin, the throat plate and from other parts and turn on the machine again. Before starting to sew, check the needle, because it can be the cause of a thread jam.
Problem 8: Shredding and Breaking the Thread
It might happen that the thread to break down very often. If this happens, you need to check out the next possibilities: is the thread getting hung up on the thread spool?
Solution: This problem can be caused by a notch in the spool, which is meant to secure the end of the thread. You can solve the issue by changing the direction the thread feeds off.
Are you using an old thread or a cheap one?
Solution: look at the type of thread you are using. Discard the supplies that seem old or poor quality.
Are you using a new needle for your sewing machine? Then this one might have a nick in it, that will play havoc with the thread. This will cause a break and shred.
Solution: Look for special needles that come with a larger path for special threads. If the thread continues to break, try to clean out all the dust and lint from the tension disk and the bobbin area.
Move your finger over the thread’s path and look for loose fabric, debris or burr that might cause the snags.
Problem 9: Poor feed technique
If you encounter this problem, here is a simple solution: pay attention to the technique you are operating your sewing machine. Make sure you are letting the feed dogs work correctly. Never force the fabric while sewing it, as it can cause a range of multiple problems.
Problem 10: Sewing machine tension problems
Most of the time, when a sewing machine doesn’t work properly, many people will immediately think that they need to adjust the tension. Luckily, most of these mechanisms require just a little work with the tension settings.
The solution: threading the sewing machine with the presser foot up is a good practice, and if the thread is not even at the front and the back, then it might be because of the tension adjustment. To solve the tension adjustment, check the manual of the sewing machine. If you don’t have a manual or can’t find one on the internet, remember that the rule “Righty Tighty, Lefty Loosey” also applies to the tension of the thread.
The Most Basic Solutions to Keep in Mind
The previous sewing problems I mentioned above are pretty significant. But to make everything clearer, I would suggest you pay attention to only 3 basic rules when the sewing machine seems to brake:
- Rethread the machine: as simple as it might be, this step has amazing results. Even the slightest bump can cause trouble to the stitching. Now, check the needle, the bobbin, and the thread and make sure everything is in its right place.
- Make a habit of cleaning the sewing machine: be honest, when was the last time you did a top-to-bottom cleaning process to your machine? Dust can accumulate in the bobbin area and tension the assembly. If you use the sewing machine daily or weekly, cleaning is a must. If you use the sewing machine weekly, then clean the machine only once a month. But if you are sewing just occasionally, clean the mechanism every three months.
- Check the thread and needle: using the right type of needle and thread is mandatory. As I already mentioned, you should work with a high-quality thread, that has a nice filament and doesn’t get woolly or irregular in thickness. Keep your collection of spools in rotation and store it out of sunlight and humidity.
Tell Me What You Think
Feeling inspired? Tell me and the other readers what was your experience with fixing sewing machines. Have you ever solved this kind of issue and what to complete what I’ve said? Feel free to add a comment down below.
So, from my perspective, fixing a sewing machine is not such a big deal, as soon as you know some rules to follow. Also, keeping the sewing machine clean and taking care of it periodically will make such a difference.
Spread the word and share your new knowledge with your friends.

